It is time for the monthly editing challenge, One Photo Focus. The challenge, for those not familiar with it, is where several bloggers will take one photo and edit it to their liking.
This month’s photo came from the host of the challenge herself, Stacy Fisher of Visual Venturing.

For my edit this month, I tried to layer a few different techniques to see where it would take me.
My first layer was a “drawing” layer. Ironically, I first tried this technique back in September of 2015 on a portrait for Stacy’s then AB Friday Forum. So, I thought I would try it again on a boat to see what it would look like. To do that, here are the step I took in Photoshop CS5:
- Open the photo.
- Create another copy (layer) of the picture.
- Change the top layer of the photo to “color dodge” in the layer mode drop down box.
- Hit CMD or CNTRL I to invert the photo coloring. (CMD or CNTRL depends on whether you have a Windows or Mac computer.)
- Apply a Gaussian blur (around 18 or your choice for more or less details).
- Select the layer and desaturate it in the layer’s tool box. (Do not try to desaturate it with CNTRL U, for some reason that does not work, or at least it didn’t for me.)
Here is a screen shot of what I got.
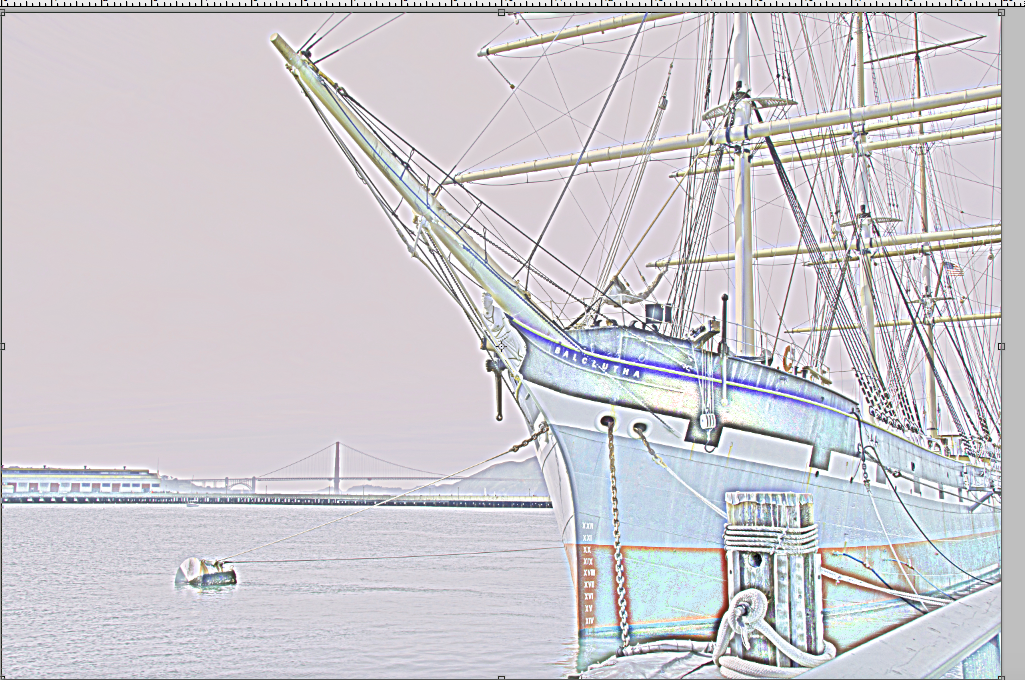
I like the look of the boat, but the technique did nothing to the sky except make it essentially disappear. So, I tried another technique on top of that edit.
For this layer, I added two filters from the Filter Gallery together. The filters I used were the Sumi-e and the Angled Strokes. If you look at the screen shots below, you can see the adjustments for each filter that was applied.


When the two filters were applied to the one layer, they added a bit more texture to the overall picture.

Then to blend the drawing layer and the filter layer, I merely reduced the opacity of the top layer (the drawing technique). This allowed the filtered layer so come through and blend some for this final look. After that, I merged the two layers together and applied the HDR Toning option that is under the Adjustments tab. In this option, I turned down the details so that a more blended, smudged look came out. I also bumped up the saturation and brightness some. And that was it:)

Feel free to comment or offer suggestions. I love to hear new ideas, even when they are constructive criticism comments. I figure the more the try, the more I will learn.
Also, make sure you go check out Stacy’s blog, Visual Venturing by clicking on the badge below. She will show you her edit as well as all the other bloggers’s submissions. Every month I am amazed at all the variety of edits. So it is definitely worth a look.
~~~~~~~~~~~~~~~~


Nice sketch result Michelle. 🙂
LikeLiked by 1 person
Thanks Laura! I am still trying to make paints similar to yours but failing, lol. I need to get the painting filter but keep delaying it since I am considering a new computer.
LikeLiked by 1 person
Oh when you get your new computer….just because I’m thinking of one also…get one with a dedicated graphics card and the most RAM you can afford. Topaz has revised its filters and they require a lot more graphics power. Oh and you’re welcome!! lol
LikeLiked by 1 person
Good to know! I’ve put it off so long since I can’t figure out what to get. There are so many options that it’s confusing!
LikeLiked by 1 person
If you are a Mac user I can help otherwise I’m clueless.
LikeLiked by 1 person
I’ve used both. I think that’s the problem. They both seem to work well. I’ve also used both Nikkon and Canon. Ugh. I’m confused!
LikeLiked by 1 person
Oh no! I think you need to choose sides. :-). I use Nikon amd a Sony mirror less and I get confused too. My fingers want to do one thing when my brain says another!
LikeLiked by 1 person
I know. I am so conflicted. The Army had me use Nikkon and the photo studio used Canon. So I find them both very good cameras. Though for weddings, the Canon did seem to have better color quality in low-light churches. But, the models of cameras may not have been quite equal. So…I remain confused. I just need to pick one and go with it. The other problem is that I am not very tech savvy. So I read all these descriptions and go…um, which one do I really need?
LikeLike
I think these days if you get comparable models, you can’t really go wrong. I’d go full frame though for sure unless you are into bird photography.
LikeLiked by 1 person
Good point. I suppose the longer I wait, the more choices I will get, lol.
LikeLiked by 1 person
hahahaha….how fun would THAT be!
LikeLiked by 1 person
I meant you’re welcome to your thanks not for me giving you advice! Lordy!
LikeLiked by 1 person
Lol, I figured:)
LikeLiked by 1 person
🙂
LikeLike
Offering suggestions? I am following these lessons to learn and improve my Photoshop CS4 “skill” 😀
Great shot and new image ❤
Ciao
Sid
LikeLiked by 1 person
Thanks Sid. There is always more to learn. I swear each tutorial or post I read I think, huh, I didn’t know that!
LikeLiked by 1 person
🙂
LikeLike
love the sketchy look and the bright colours
LikeLiked by 1 person
Thanks for the feedback!
LikeLike