This month’s One Photo Focus features a wonderful photo from Stacy at Learning to See Light.
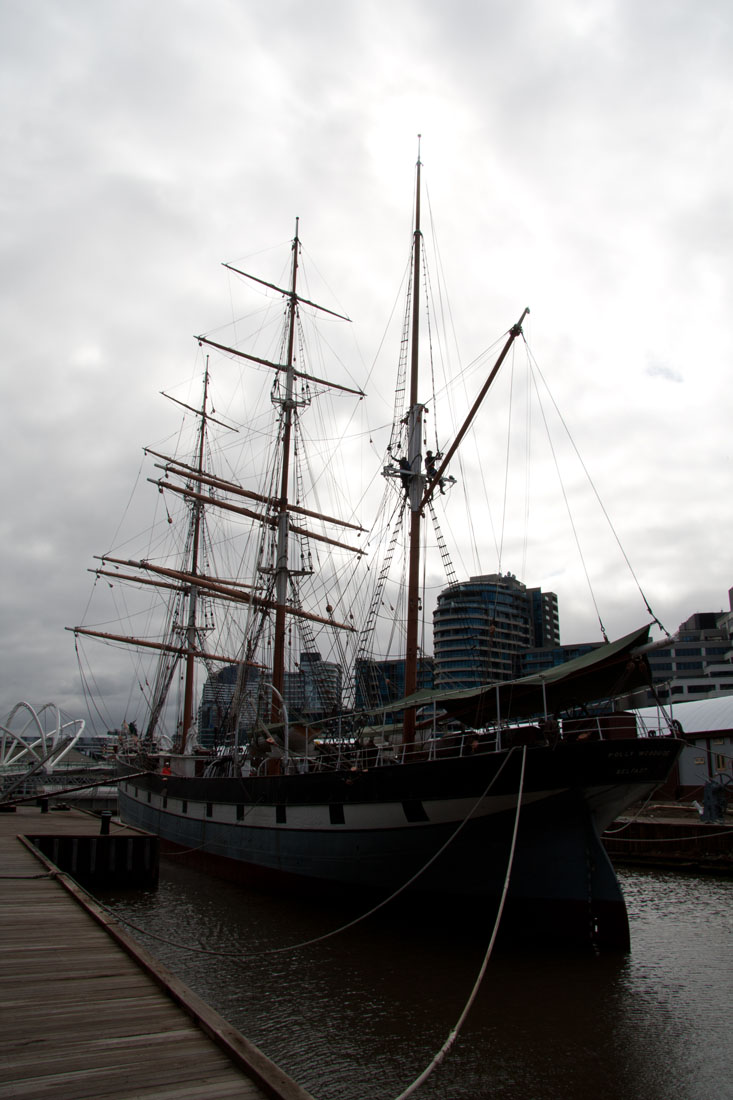
This glorious boat in Melbourne caught my eye and I wanted to bring out the boat more, but not lose the clouds in the process. Fortunately, Stacy shot it in RAW, which allows for more control over the two different lighting needs between the boat and sky.
The first step in this process is to open the photo in RAW. If you look at the screen shot below, you will see that there are several options to tweak. All you have to do is slide the levers to the right or left to change them.
In this case, I wanted to add more light to the boat to bring out the colors and features. To do that, all I had to do was slide the Fill Light option to the right. To bring out the details in the clouds, the Recovery lever was slid to the right.
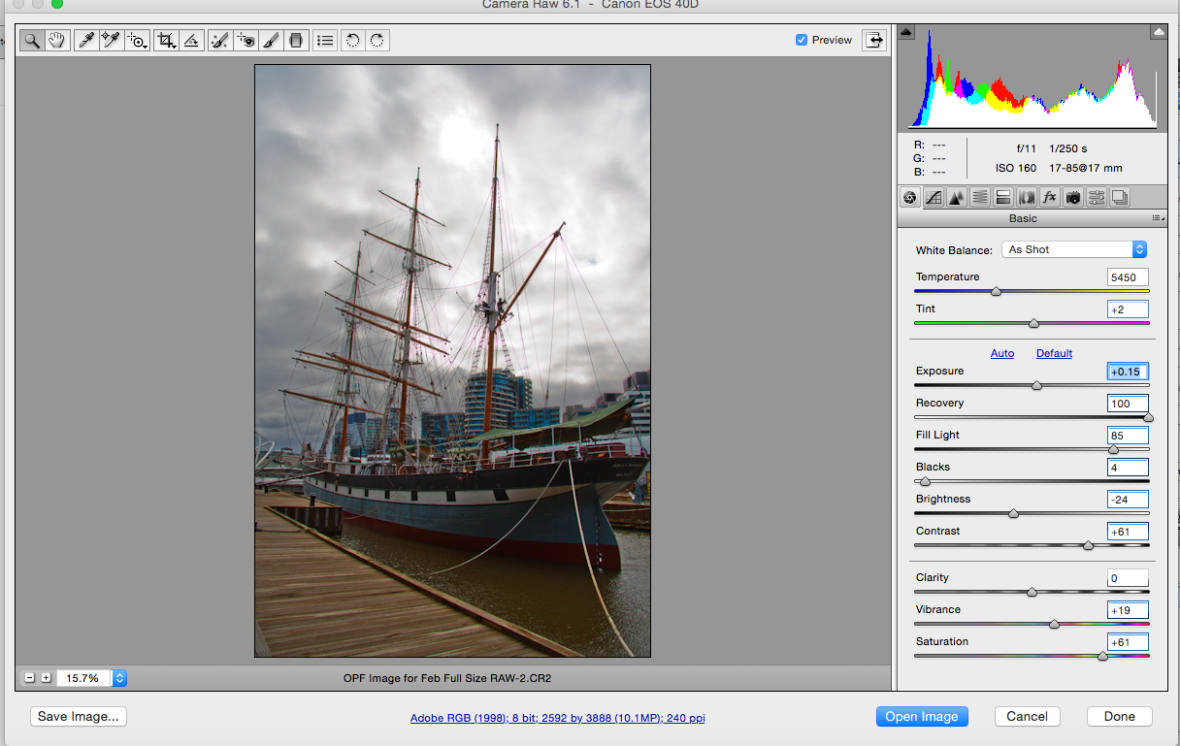
I also adjusted the Saturation and Vibrance to boost the colors a bit more to make the boat stand out and be more vivid.
After that, I opened the photo in Photoshop CS5. From there, I made two layers of the photo. In one, decreased the brightness. That brought out the clouds more and made them more intense. I placed that layer behind the brighter boat layer, in which I erased out the clouds out of. This allowed me to have the deep intense clouds with the brighter boat at the same time. So, I merged those two layers together into one photo.
With that, I did some slight adjustments to the brightness and saturation and decided that was enough.
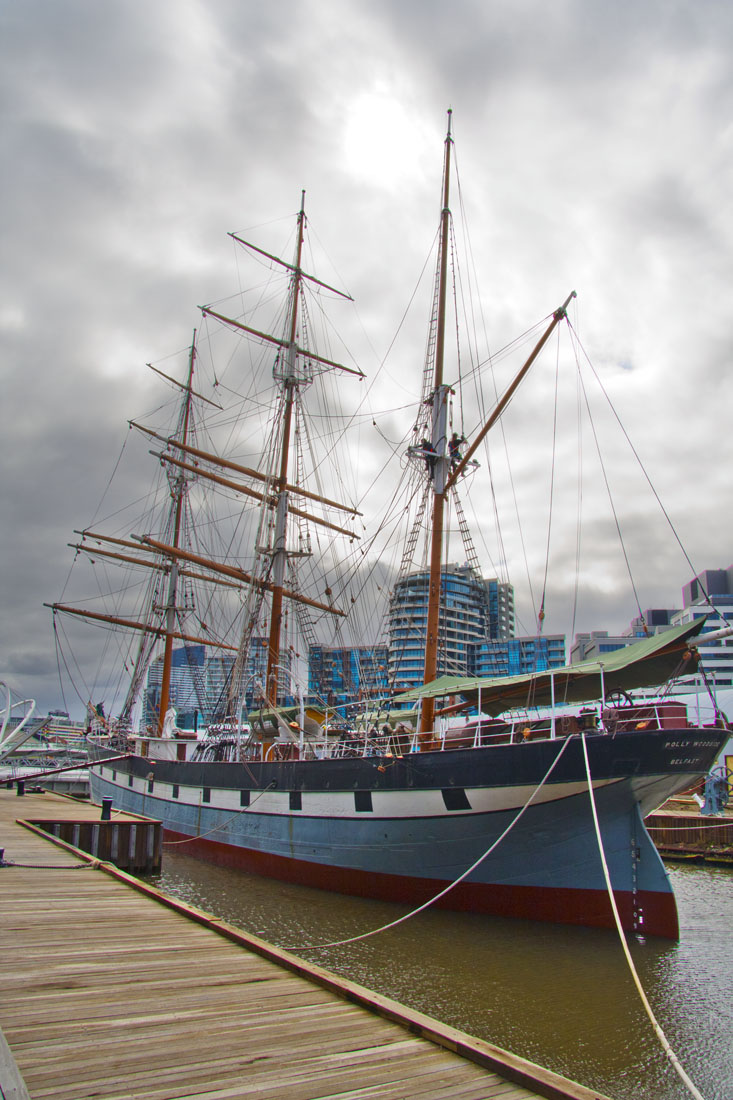
What do you think? Have any questions? I think I like the intense clouds, but I think the buildings in the background could probably be toned down some. However, that was a lot of small detail work that I was not ready to do. So, I left it as is. Either way, it is a grand boat fore sure.
Thanks for letting us work on your photo Stacy (at Learning to See Light).
Props go out to another Stacy too though. Stacy at Visual Venturing is the host of the One Photo Focus each month. Her post will not only show you her edits on the Melbourne boat photo above, but also the edits and links to other photographers submissions as well. It is rather interesting to see all the different editing options on one photo.
To get more info on One Photo Focus, just go to Stacy’s guidelines page…and then join the fun.
~~~~~~~~~~~~~~~~~


Wonderful after image. Thanks for detaining your process. I have lots to learn; so it really helps.
LikeLiked by 1 person
Thank you. I am glad you found it useful.
LikeLike
LOL I just saw that I had a typo — It was suppose to be detailing — of course. Thanks again. 🙂
LikeLiked by 1 person
Oh I figured. I do that all the time, especially when replying on my phone. Between the fat fingers and little buttons and auto correct, sometimes I am like, “What was I trying to say?”
LikeLiked by 1 person
I was on my iPad and sometimes it auto corrects right as I hit send. Very frustrating — I can look like a dummy without my iPad’s help. LOL
LikeLiked by 1 person
I’ve done the same many times.
LikeLike
Great breakdown Michelle and enjoy your final image, so many different variations, I am really impressed at the amount of work people put in. Yeah Im sorry about the messy background but there wasn’t any avoiding it being in the middle of the city, literally 🙂
LikeLiked by 1 person
I think it’s so cool it was there in the city! I was just too lazy to tone done the buildings that got saturated along with the boat. There were so many cool edits!
LikeLike
I love the vibrant colors of the boat, Michelle! It was interesting to learn how you used PS layers to darken the sky. For me, ColorEfex Pro and the choice of “pro contrast” is how I accomplish that. Keeps me from having to figure out those darn layers 😉 Nicely done and, as always, thanks for the wonderful “plug” 🙂
LikeLiked by 1 person
I will have to learn these new and different ways since my software is quickly becoming outdated. You deserve the “plugs” for running this fun challenge and all your great work lady!
LikeLiked by 1 person
Awww, thanks ☺️ And I think you’re doing wonderfully with your software!
LikeLiked by 1 person
☺️ I’m blushing!
LikeLiked by 1 person
This is so amazing! I need to start shooting in RAW but I’m intimidated by the whole editing process. So much to learn but such incredible results!
LikeLiked by 1 person
I didn’t always shoot in raw either. I just finally said, what do I have to lose? So start shooting and just don’t save over your originals.
LikeLiked by 1 person
Good advice!! I need to try it 🙂
LikeLiked by 1 person
RAW has saved many a photo for me when I screwed up the settings or when there has been multiple lighting levels in one picture. I will almost never shoot without a RAW option again now.
LikeLiked by 1 person
I’m sure once I start I’ll never stop!
LikeLiked by 1 person
It is addicting.
LikeLiked by 1 person
I love the foto! It looks very natural. I was just wondering: what feature would be close to the recovery-slider in lightroom? I usually do it with a layer that gradually darkens or clears the sky….
LikeLiked by 1 person
Good question! I have a very limited version of Lightroom so I have not played with it too much. I may have to use the phone-a-friend option to find an answer.
LikeLike
Thought I’d be Michelle’s phone-a-friend 🙂 In LR, you can use the shadows slider to brighten up the image and recover all the wonderful detail in the darkened areas; for the clouds, I would begin by using the highlights slider and slide it to the left to bring out the detail. Hope this helps!
LikeLiked by 1 person
Thank you Stacy!
LikeLike
My pleasure 🙂
LikeLike
😀 I think it doesn’t exist. ‘Clarity’ comes close but it’s not recovery per se… nice feature, though..
LikeLiked by 1 person